When adding a chemical to your inventory, you will need to select the In-lab Storage Location. This helps you manage and organize your lab efficiently. Common storage locations include "flammable cabinet," "refrigerator," "freezer," "acid cabinet," "Chemical storage shelf," etc. Please check your list of existing storage locations before creating a new one to avoid duplicates like multiple "chemical storage shelf" entries.
Creating a Storage Location
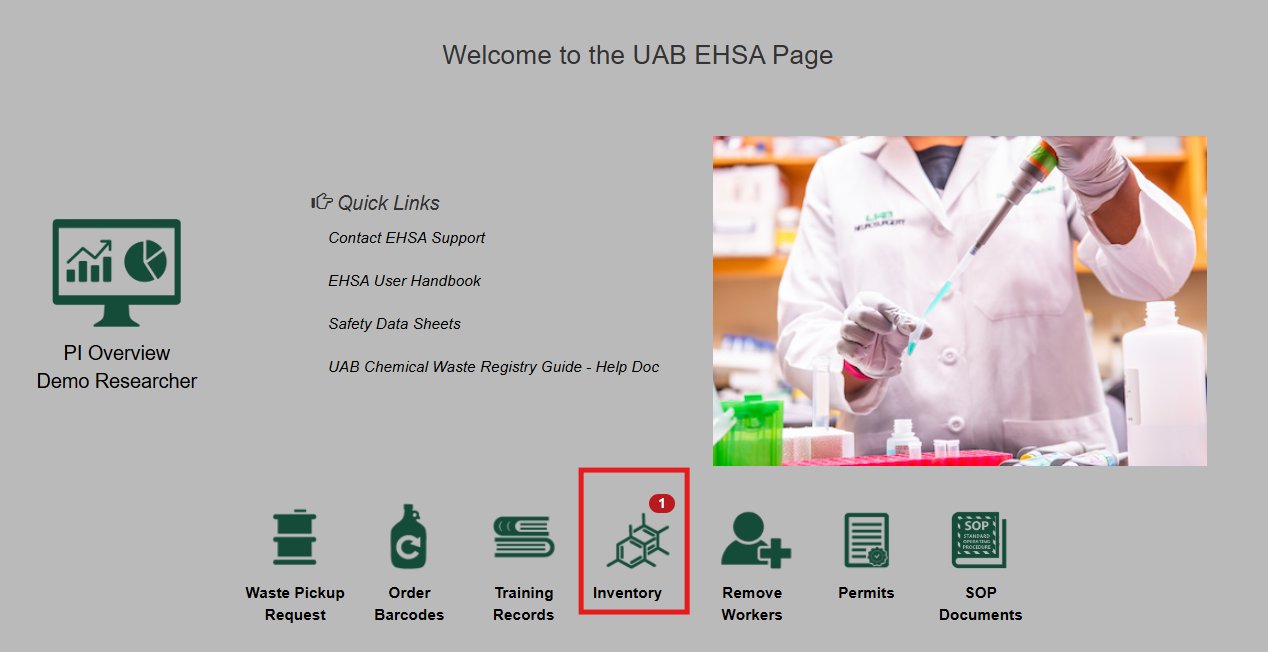
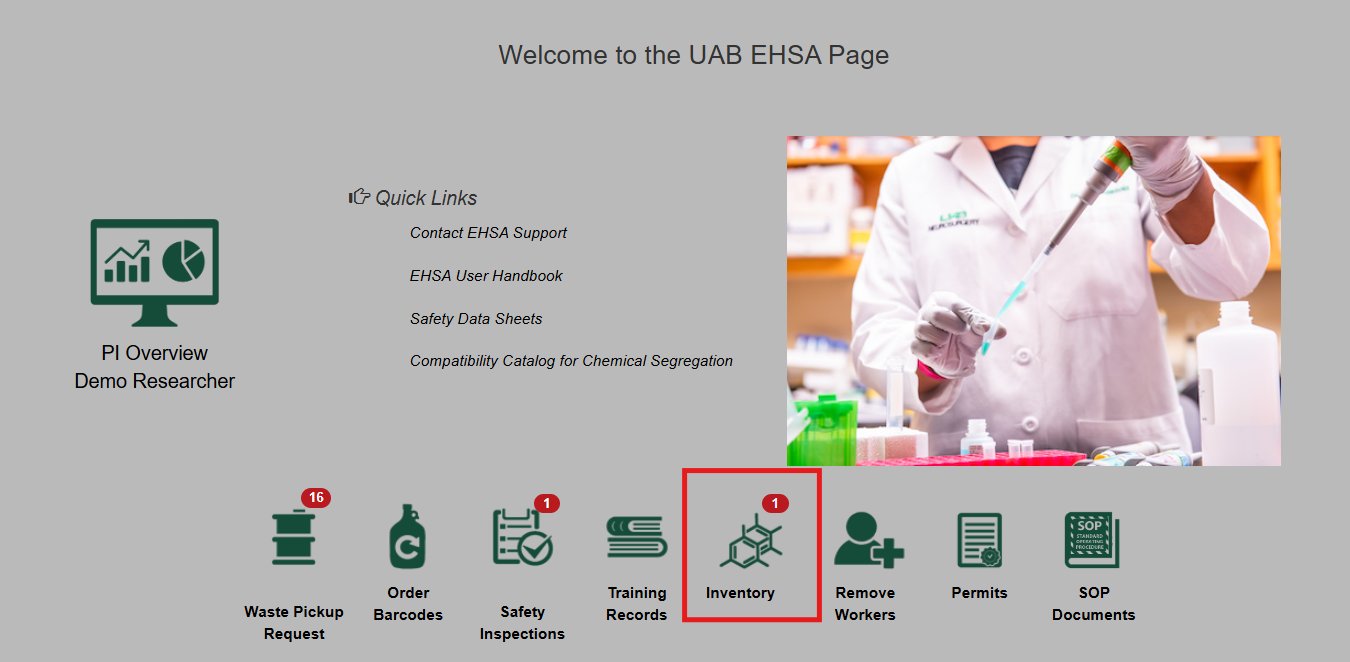
1. Click on “Inventory” icon
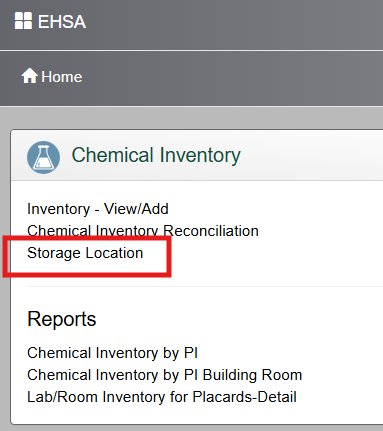
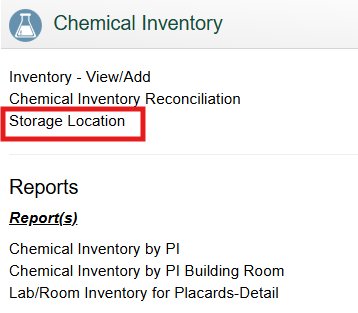
2. Select “Storage Location” from the Chemical Inventory menu

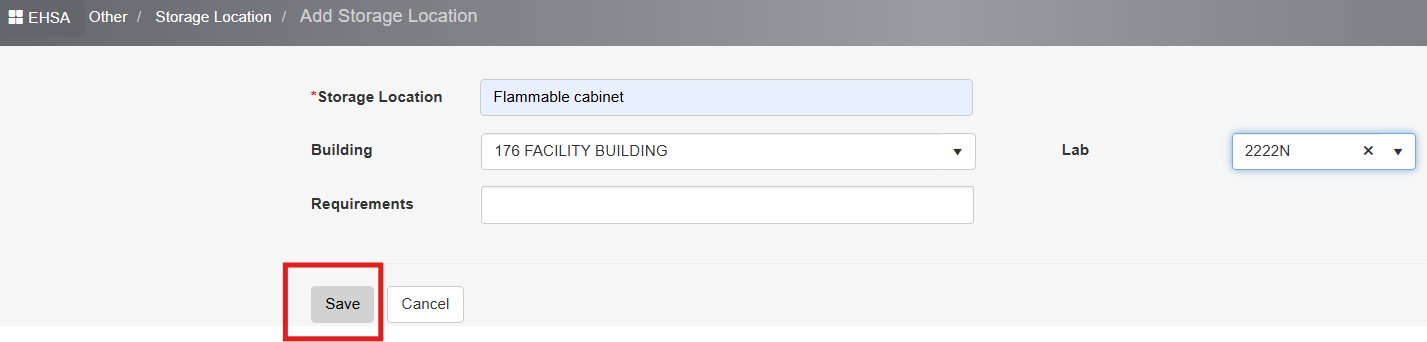
3. Click on "+Add" icon (left top corner), a new screen will pop up
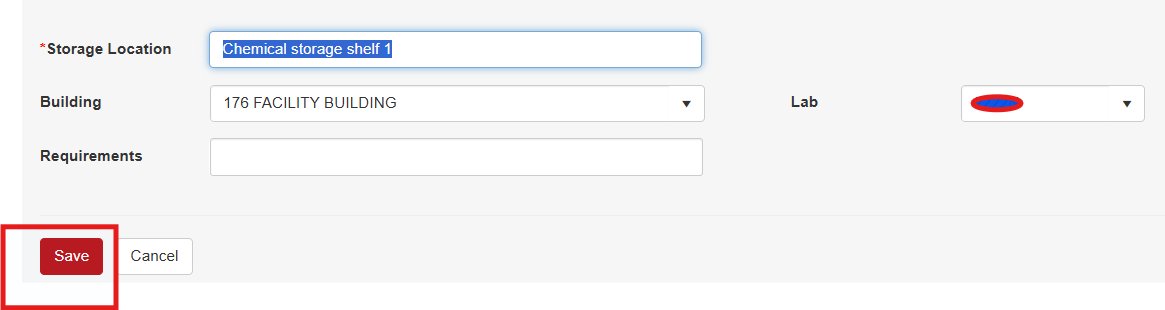
4. Fill out all the information. You can skip the storage requirements section.
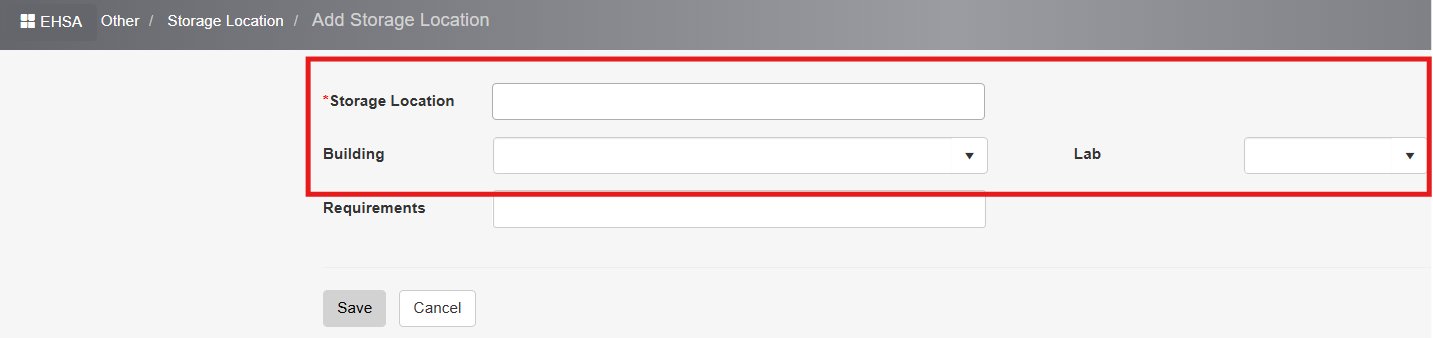
5. Click on "Save"
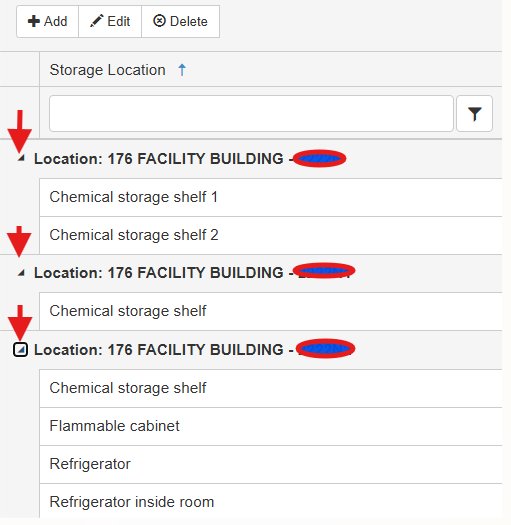
6. Click on "►" next to your lab location to see a full list of your storage locations
Editing Storage Location
1. Click on “Inventory” icon
2. Select “Storage Location” from the Chemical Inventory menu
3. Click once to highlight the storage location you wish to edit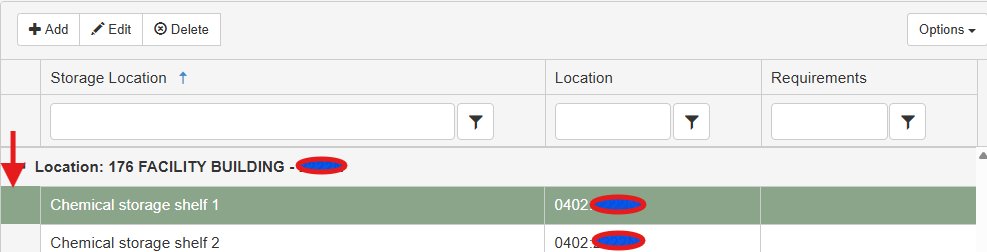
4. Click on "Edit" icon (left top corner), a new screen will pop up. Make the changes and select Save after editing.
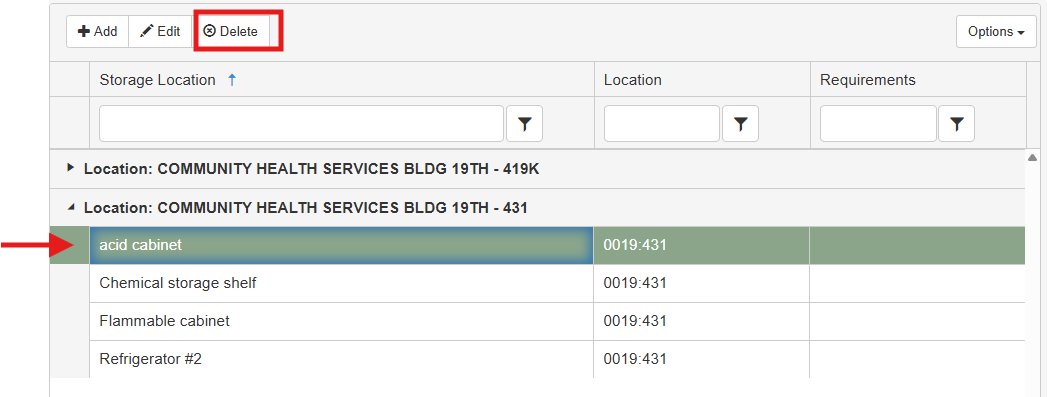
Deleting Storage Location
1. Click on “Inventory” icon
2. Select “Storage Location” from the Chemical Inventory menu
3. Click once to highlight the storage location you wish to delete and select Delete icon