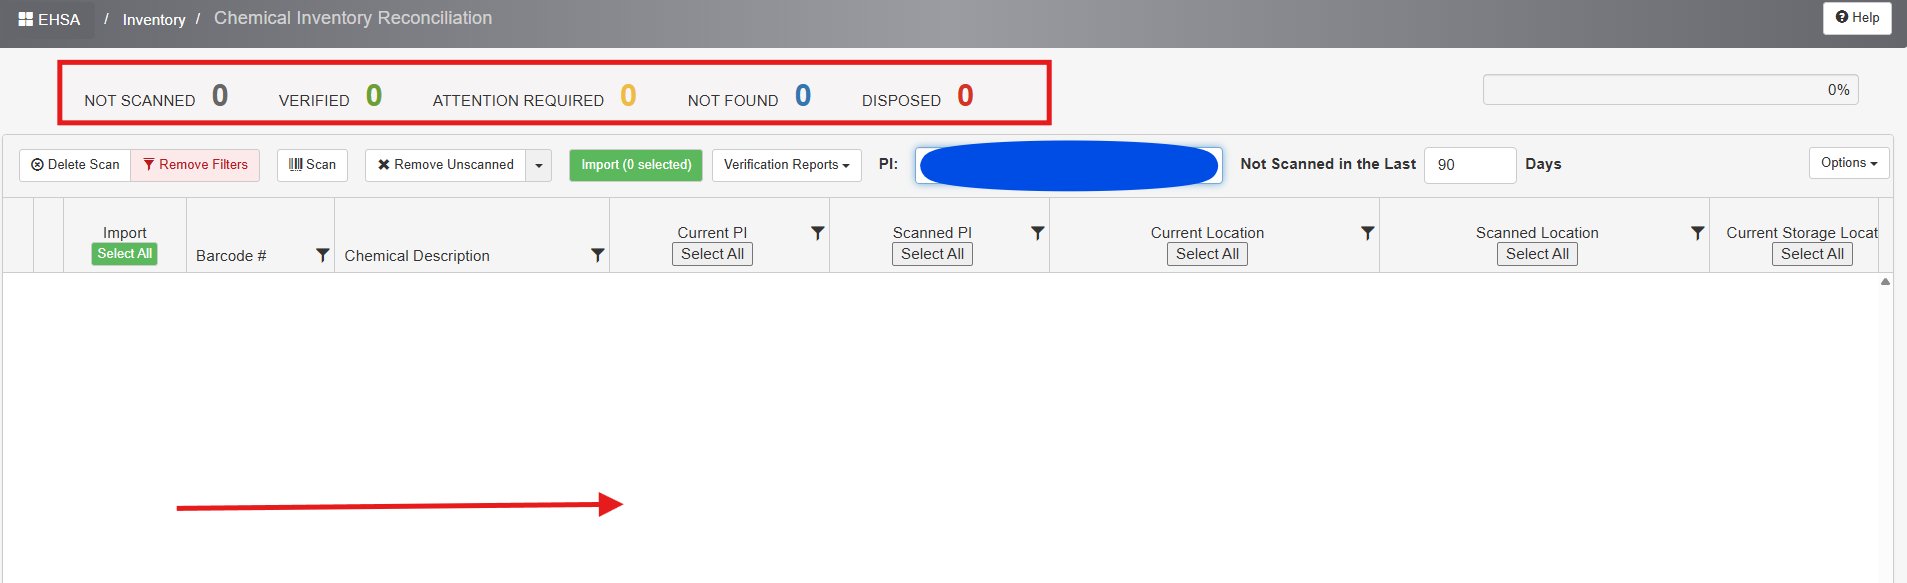
From this screen, users can scan and verify the Chemical Inventory for Principal Investigators (PIs). All UAB locations where chemicals are used or stored, such as research laboratories and animal facilities, must complete annual chemical reconciliation.
Inventory Reconciliation – Scanner Option
1. Click on “Inventory” icon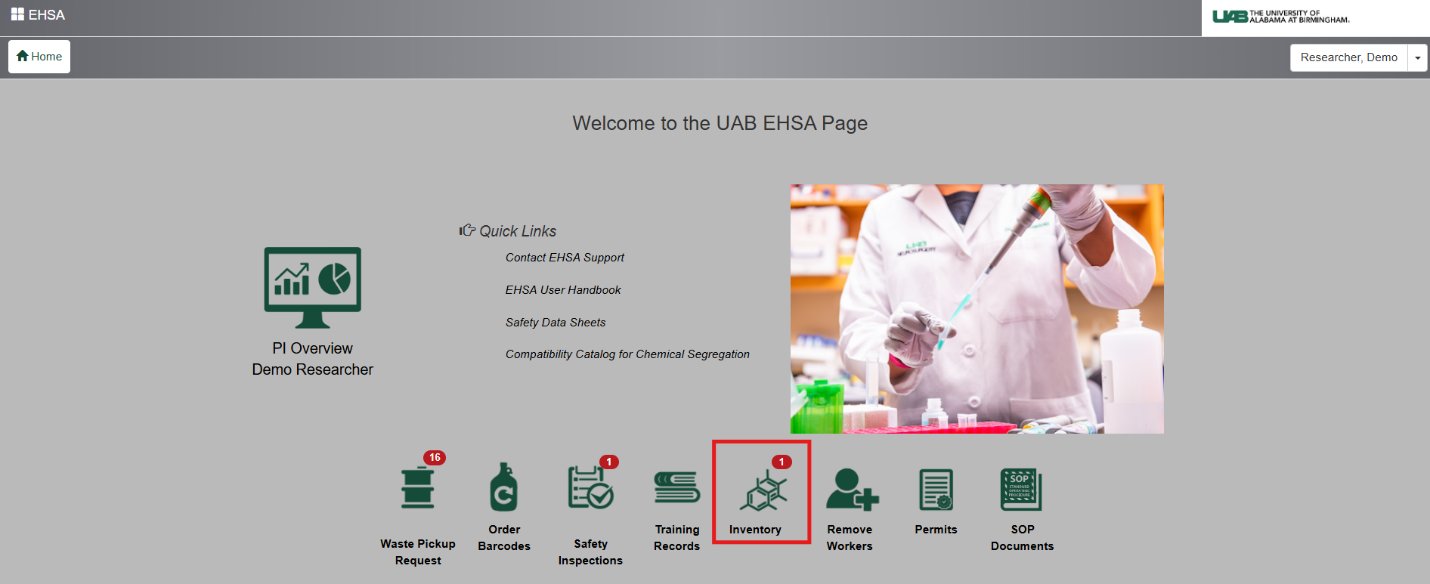
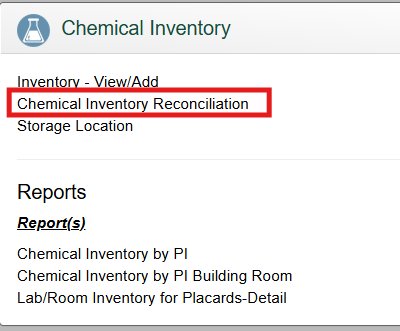
2. From the Chemical Inventory menu, choose “Chemical Inventory Reconciliation” to begin the process.
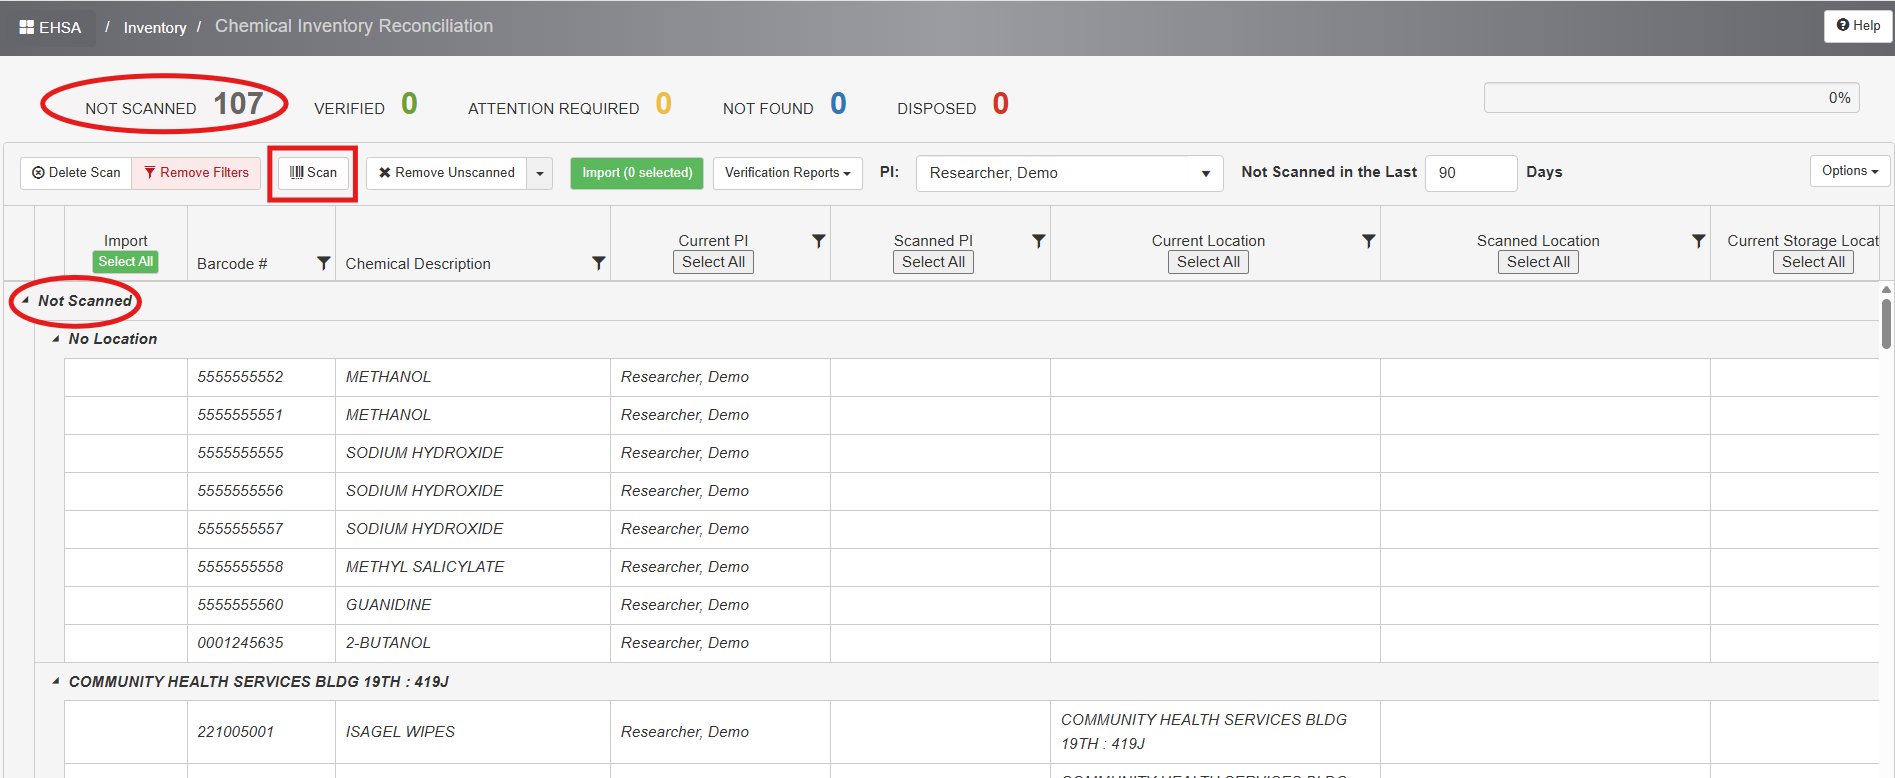
3. On this page, your inventoried items will appear under the “Not Scanned” section. Connect the scanner to your computer, then click the “Scan” icon to begin scanning.
4. When the screen appears, select “Location” and “In-Lab Storage Location” to enable the Barcode field. Ensure the cursor is in the Barcode field before scanning the chemical bottles.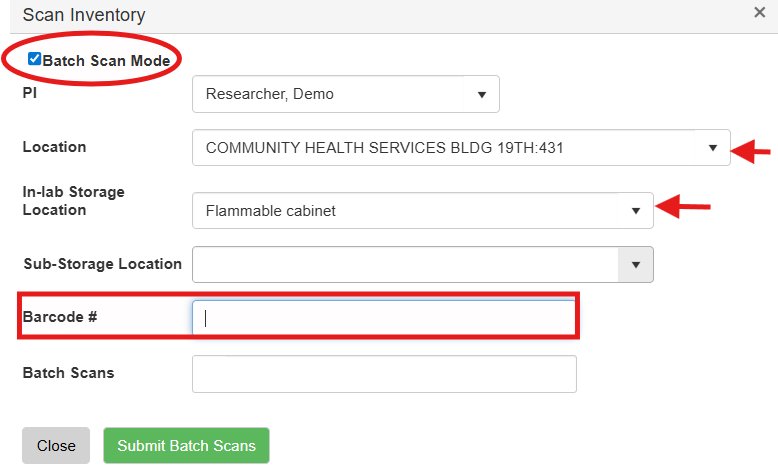
NOTE: Choose Batch Scan mode to perform a comprehensive scan of all chemicals stored in a specific in-lab location.
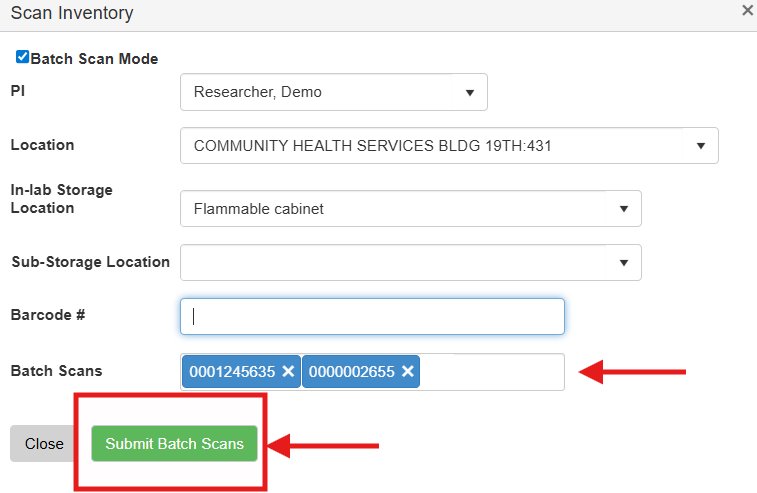
5. Once the scanning is complete, submit Batch Scans.
NOTE:
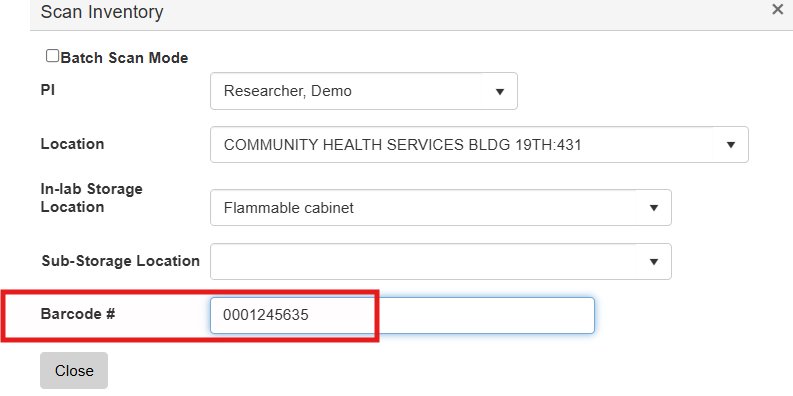
1. If you opt not to use Batch Scan mode, continue scanning each item individually, ensuring the correct in-lab storage location is selected. Once all items are scanned, click “Close” to finish.
2. If you're entering barcode numbers manually instead of using a scanner, press the Enter key after each entry.
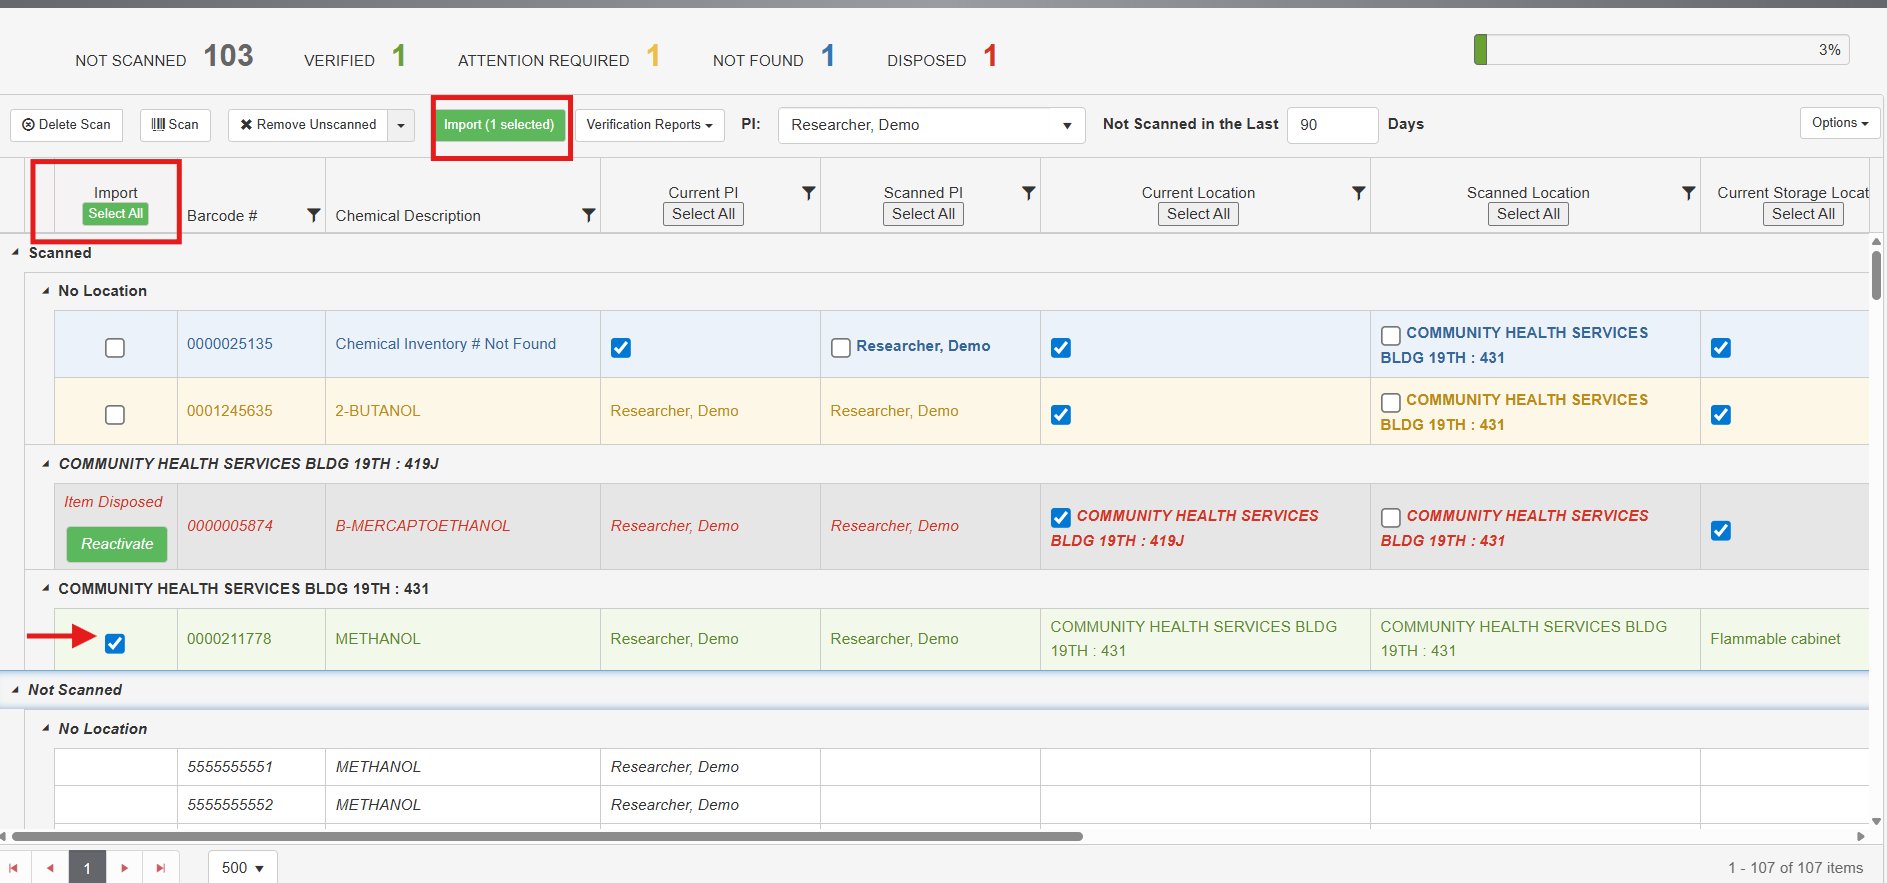
6. The screen will now display the count of chemicals categorized as "Not Scanned," "Verified," "Attention Required," "Not Found," and "Disposed." Additionally, the progress bar in the top-left corner indicates the percentage of the scanning process completed.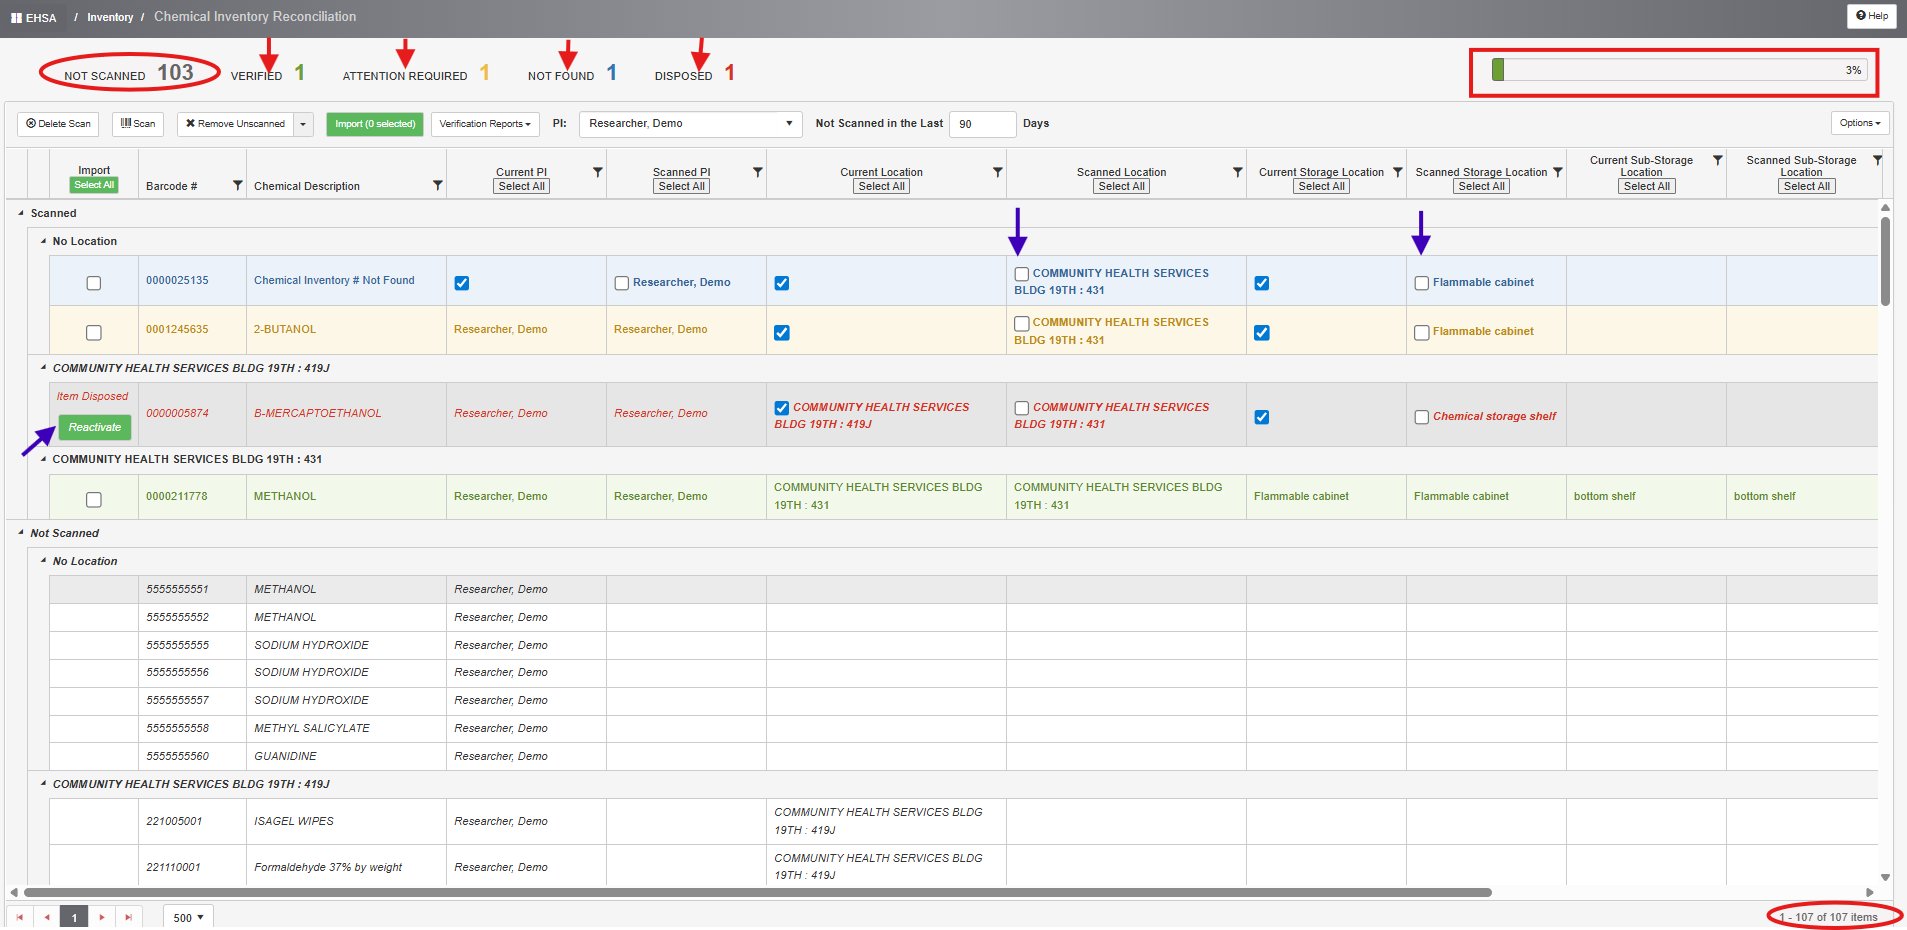
NOTE:
Verified – Green highlight
Items marked as “Verified” in green can be selected using the Import button. Once selected, click “Import” to update the data.
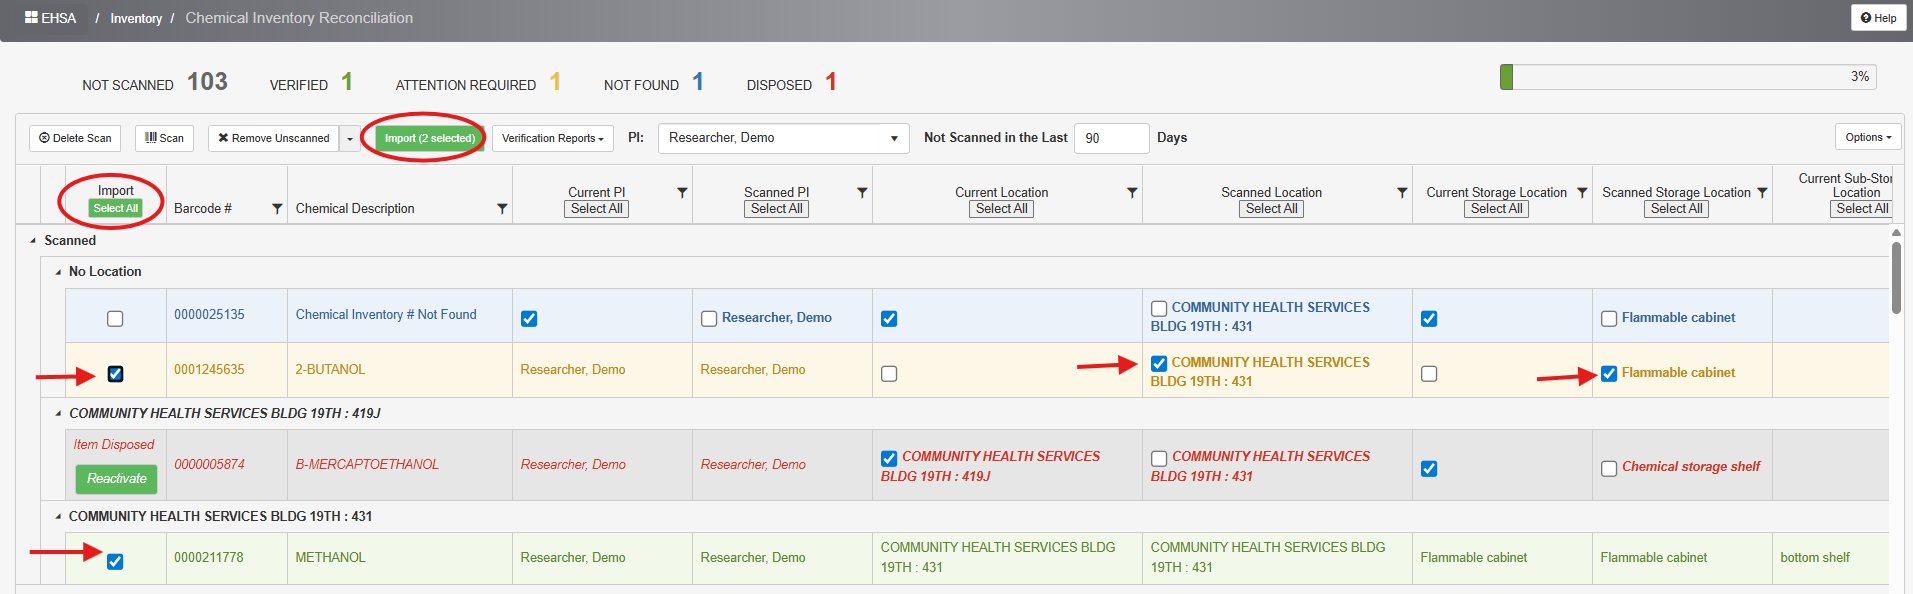
Attention Required – Yellow Highlight
These items are scanned at a different location than originally entered to the EHSA system or may belong to a different PI. Addressing the attention required item is done by updating/correcting a PI, location and/or storage location.
To address the issue, check where the small check box appears (in which column; PI, location etc.).
1.Current location means the location where they were entered into the system.
2. Scanned location means a location where the items were scanned (physically scanned during the reconciliation of your inventory).
3. If you decide the “scanned location” is the location where this should be, check the box in the scanned location. Similarly, if you see check boxes for PI, storage and sub-storage locations, make appropriate selections.
The idea of reconciliation is to import all the scanned and verified data (see screenshot for import button) to update your inventory. So, after selecting the appropriate check boxes [] for anything that appeared in yellow background, you must click "import" for updating that entry in the actual inventory field.
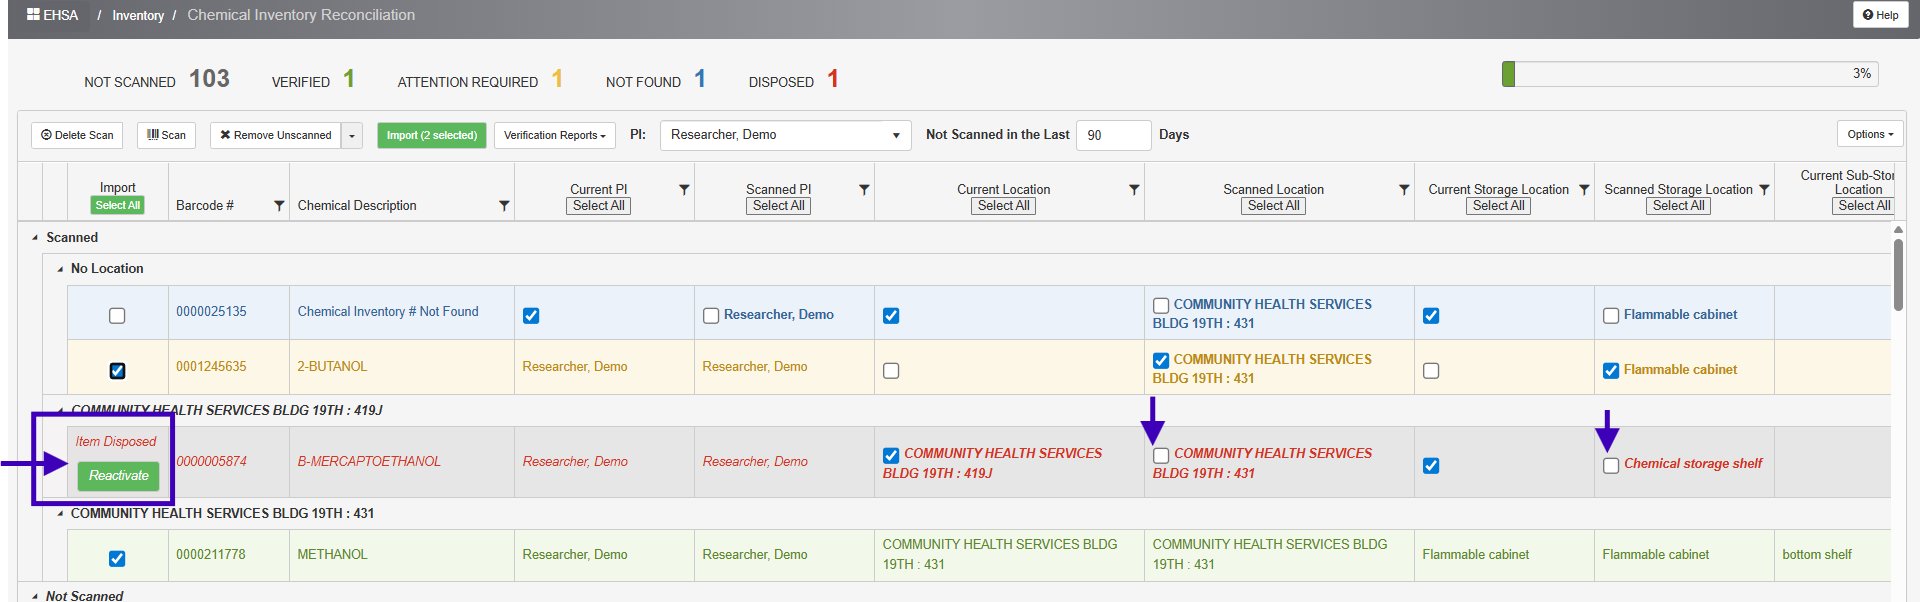
Not Found - Blue Highlight
The Not Found chemicals are not found in your chemical inventory. They might not be entered into the system OR your scanner did not read the barcode properly (partial barcodes are due to fast scanning; please give at least a couple of seconds for each scan), OR the scanner read the vendor barcode rather than the EHS barcode.
If the issue arises because no data was added to the inventory after barcoding the bottle, locate the bottle using its barcode number from the storage location. Then, enter all relevant details in the Inventory View/Add section. Once the information is updated, the entry will appear in green as “Verified” in the Reconciliation section, and you will be able to proceed with the import.
Disposed – Gray highlight in red font
You can reactivate chemicals that were previously marked as "Disposed" if they are found during scanning. To do this, click the “Reactivate” button to restore the chemical in your inventory. The entry will then appear as “Attention Required” with a yellow highlight. Make the necessary checkbox selections and proceed with the import.
7. Not scanned Items
If you scanned all items in the lab and you believe the unscanned items were disposed of in the past, but your inventory was not updated at that time, highlight the unscanned item, click “Remove Unscanned” button. A pop-up box appears, choose the reason of removal, and click “submit.”
You can remove all unscanned items at once by clicking “Select All” option. Please select the appropriate reason for removal in the dialogue box before selecting Remove all option.
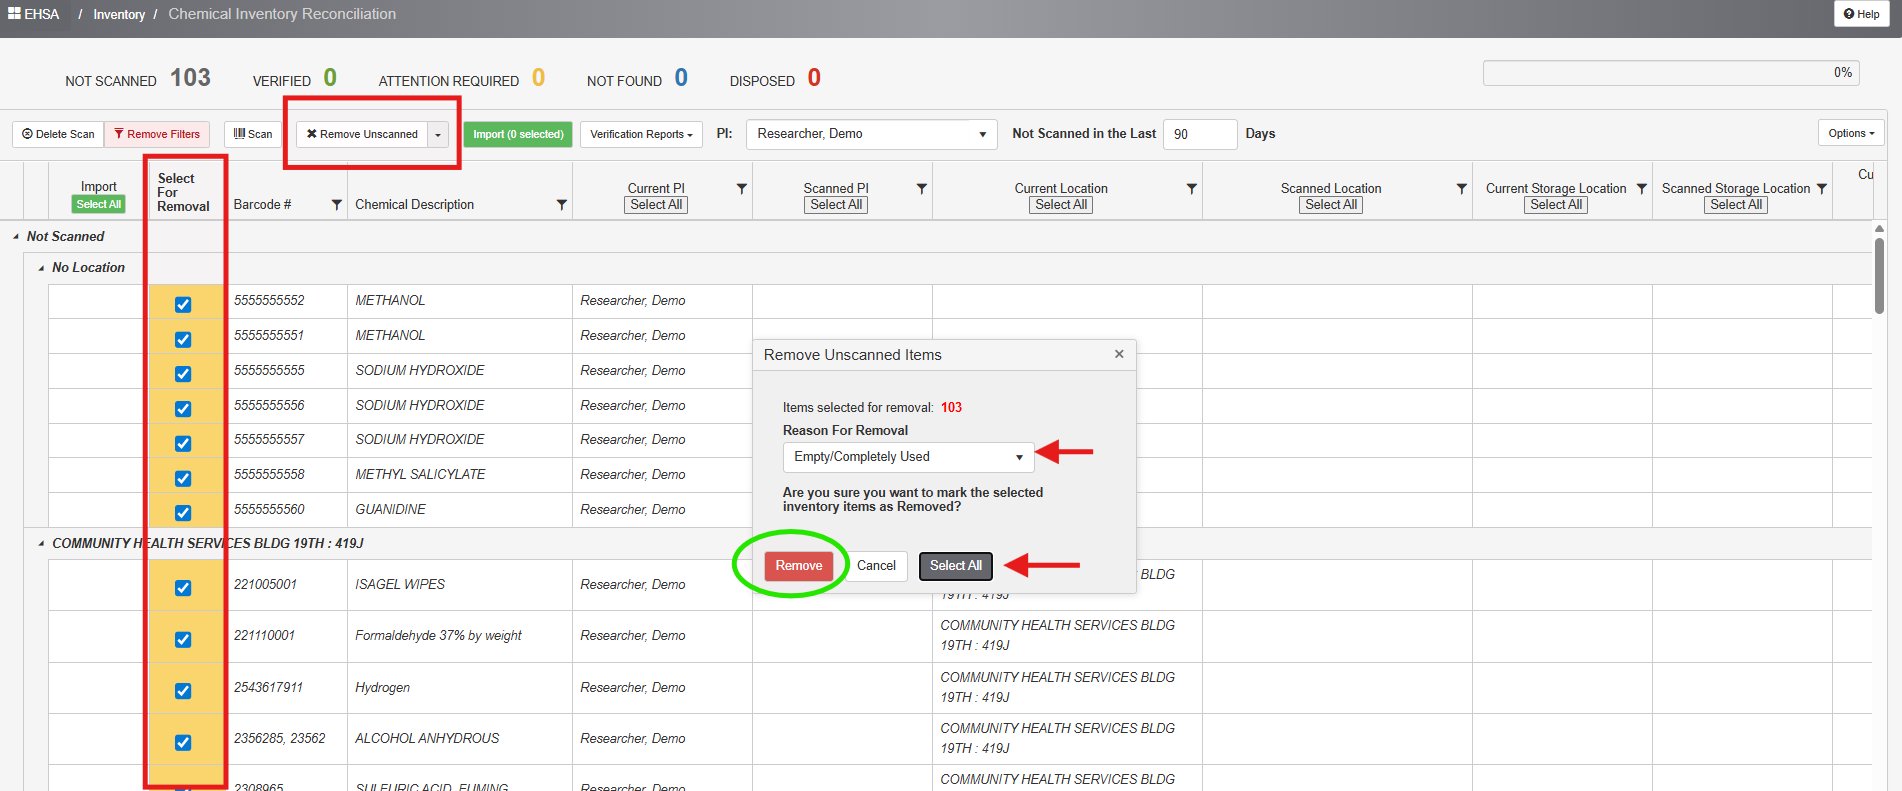
NOTE: After reconciliation, the page will display no chemical details, and all the top sections will show zero values.