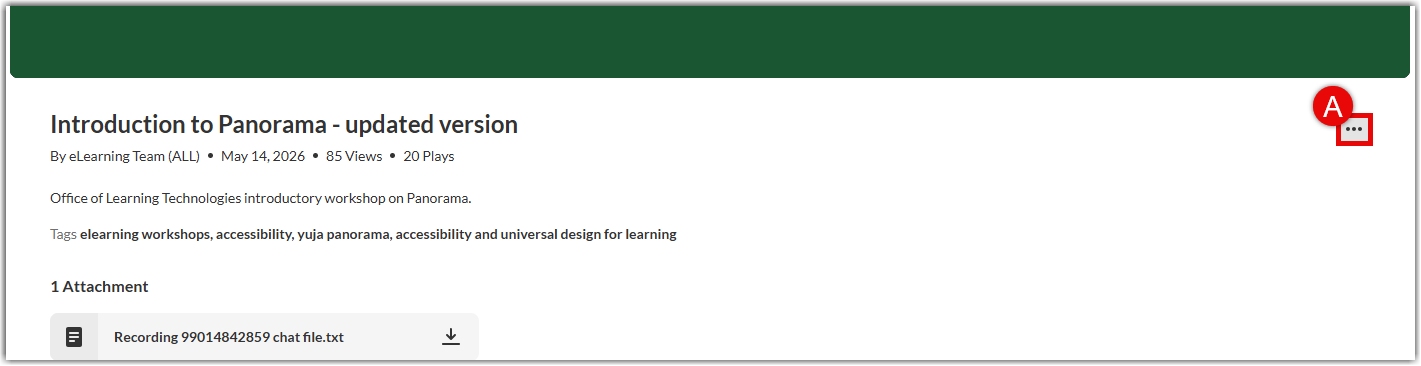
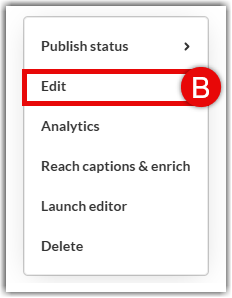
Once your media is uploaded to Kaltura Media Space, click the three dots menu (A) on the media page and choose Edit (B). On this page, you can adjust media details, manage privacy, assign user roles and permissions, and change video assets. The sections below will walk you through all the available options.
Note for users of screen readers: Letters in parentheses in the instructions below refer to corresponding areas on example images. If you have any questions about these instructions, contact the Office of Learning Technologies for assistance opens a new website.
Edit Details:
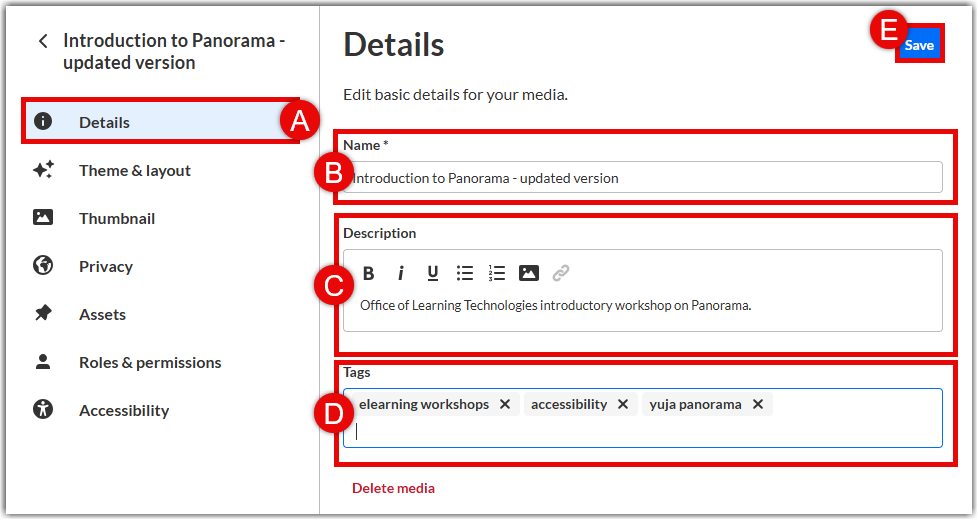
- Click the Details (A) tab to access and edit basic media metadata.
- Edit the Name (B) of your media (this field is required).
- Edit your Description (C) using the rich text editor to include formatted text, bullet lists, images, or hyperlinks.
- Add or remove Tags (D) to help users search for and discover your media.
- Once your changes are complete, click Save (E) in the top right corner.
Privacy & Publishing:
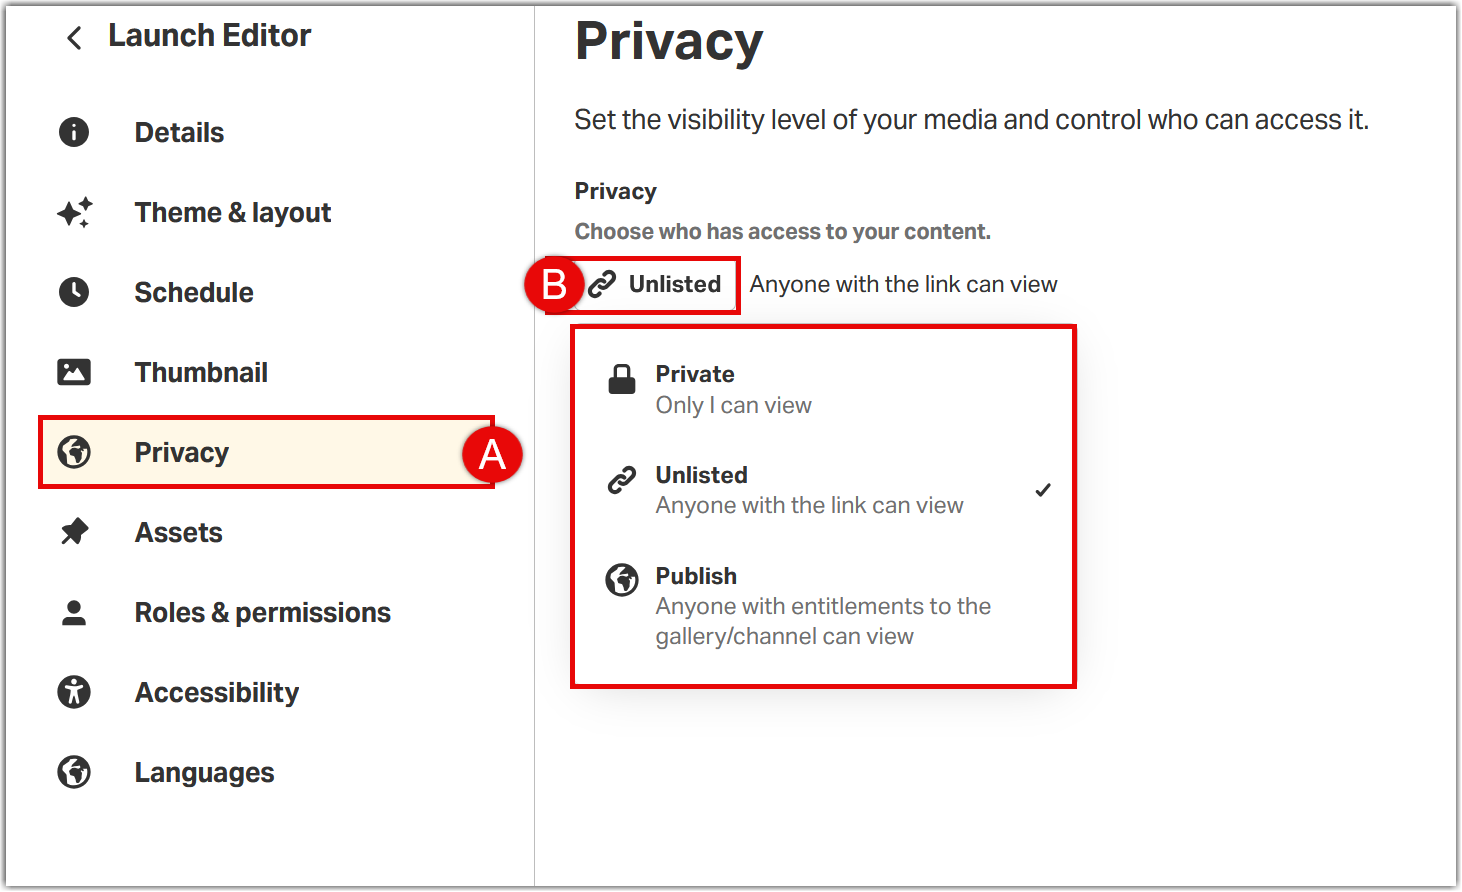
- Click the Privacy (A) tab to view or update visibility settings.
- Click the Published (B) dropdown to toggle media visibility or update publish locations.
- Private: Media is only visible to the owner and users assigned an Editor, Publisher, or Viewer role. Owners, Editors, and Publishers can add media to their Canvas courses.
- Published: Makes the video available to view:
- In the Media Gallery of specific Canvas course(s) for all enrolled students/instructors.
- In a MediaSpace Channel, governed by that specific channel's privacy settings for access outside of Canvas.
- Unlisted: Makes the video accessible to anyone who has the direct link.
Important Notes on Unlisted Visibility
- Availability: Unlisted media is only available on the MediaSpace site (it is not available within the Canvas integration) or to viewers with the media’s direct link.
- Publish Location Warning: Changing a video's status to Unlisted will automatically remove it from all previously published course locations or channels.
- Best Practice Recommendation: If you require a previously published video to also be available as Unlisted, create a copy of the media and set the duplicate file to Unlisted.
Managing Roles & Adding Collaborators:
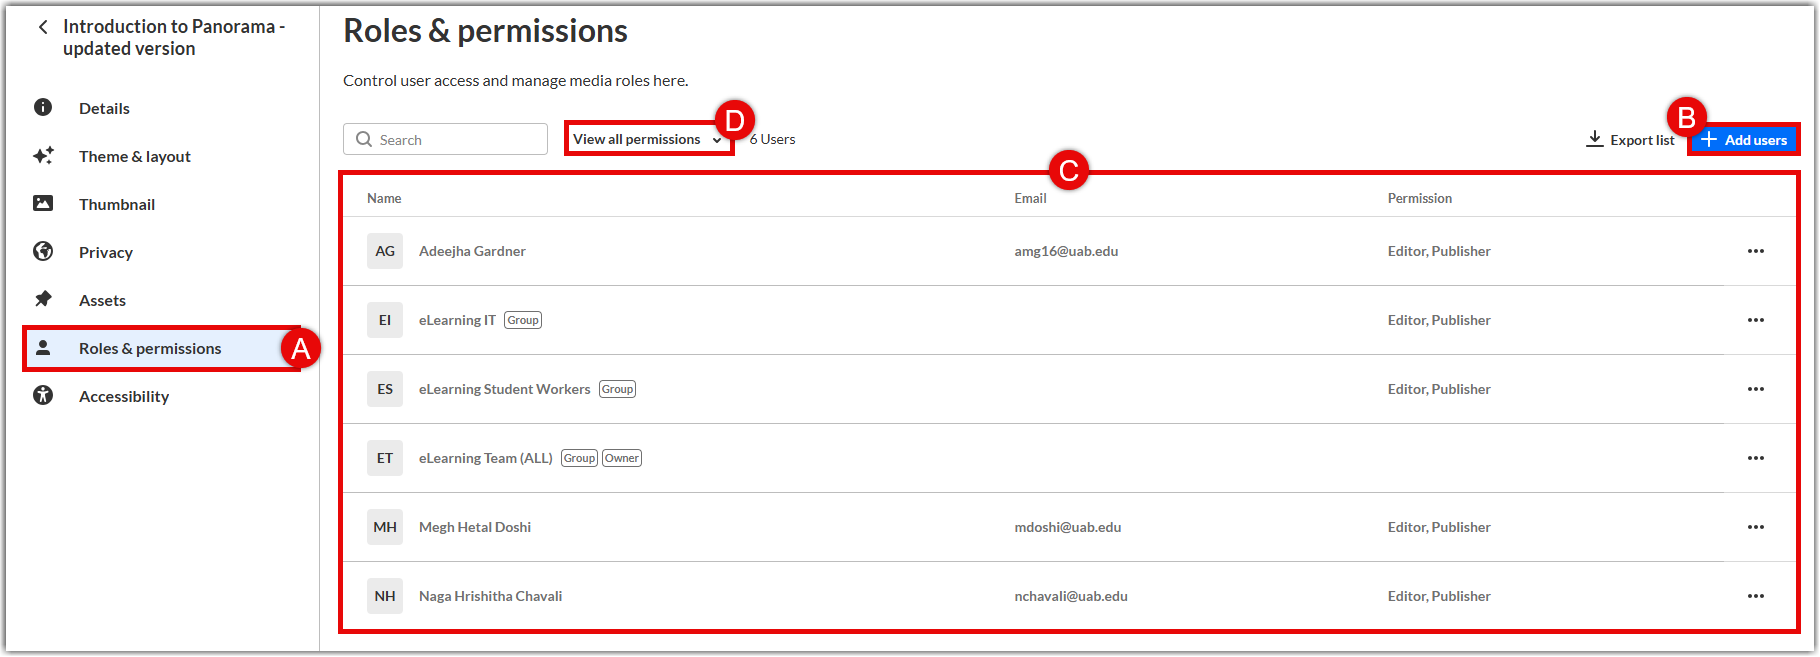
- Click the Roles & permissions (A) tab.
- Click + Add users (B) to open the collaborator dialog window.
- View existing Users/Collaborators (C) or filter the list by permission level using the View all permissions (D) dropdown.
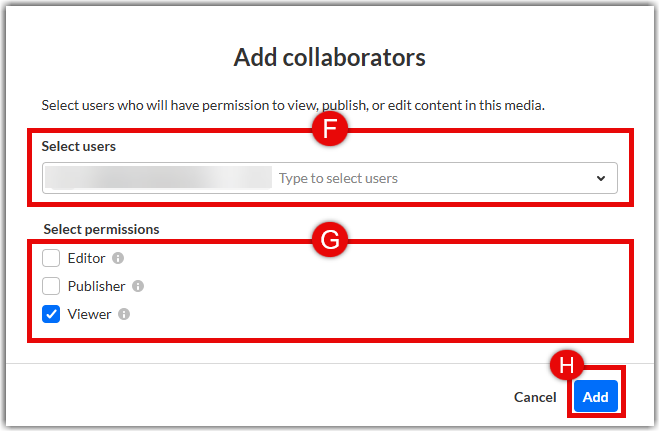
- Type a BlazerID or name to search for and Select users (F).
- Select permissions (G): Check desired boxes:
- Editor: Allows the user to edit original content.
- Publisher: Allows the user to publish media into their own courses/galleries (no editing).
- Viewer: Allows the user to view media (no publishing or editing).
- Click Add (H) to finalize permissions.
Edit Thumbnail:
Users can select a thumbnail image for their video from a file upload, a specific frame in the video, or imported from a URL. Follow the directions below for your preferred method.
Upload New Image
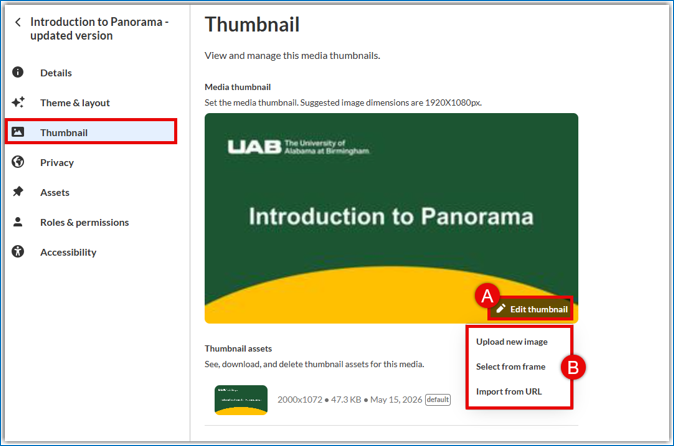
- Click Edit thumbnail (A) to open the dropdown menu, then select Upload new image (B).
- Choose the desired file from your computer. The image will load and become the default thumbnail for the media.
Select Thumbnail from Frame:
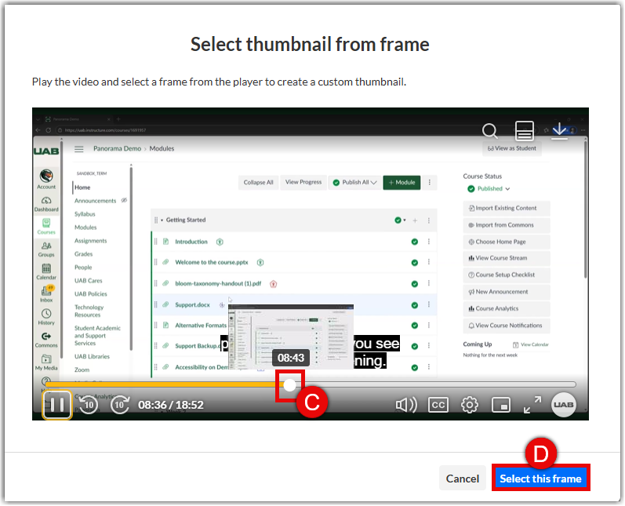
Users can choose a particular second of the video and capture it as a still image to be used as the thumbnail.
- Click on Edit thumbnail (A) and select Select from frame (B) from the menu.
- Click and drag the white circle (C) on the playback timeline to the desired time in the video.
- Click Select this frame (D). The image displayed in the player at that moment will become the thumbnail image.
Import Thumbnail from URL:
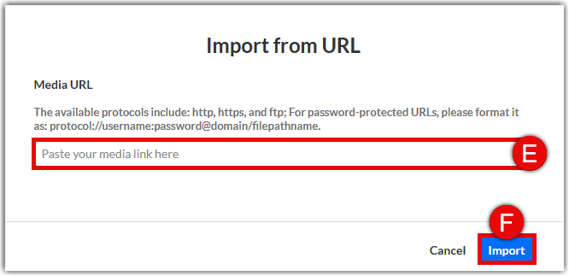
Users can import an image from an external web link to be used as the thumbnail image.
- Click on Edit thumbnail (A) and select Select from URL (B) from the menu.
- Paste your direct image link into the Media URL field (E).
- Click Import (F) to set the image as the default thumbnail.
Thumbnail Assets:
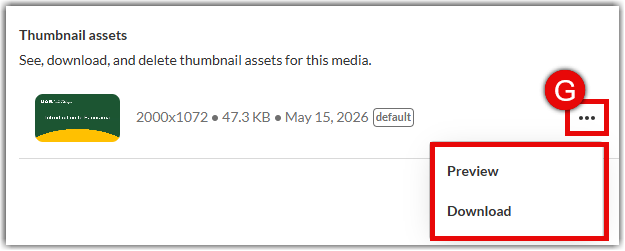
Manage, preview, or download thumbnail files associated with your media.
- Locate the item listed under the Thumbnail assets section.
- Click the Three Dots menu (I) to select Preview or Download to save the current thumbnail image.