The Kaltura Media Space referred to as My Media is a great place to manage media such as videos, still pictures, and audio clips. There is no limit on storage space and you can publish/share media to multiple places with just a few clicks. Media can be added to your My Media in various ways. Once Media is added to My Media, it can be embedded, published or shared so others can view it. Click the green buttons below to navigate this guide.
Note for users of screen readers: Letters in parentheses in the instructions below refer to corresponding areas on example images. If you have any questions about these instructions, contact the Office of Learning Technologies for assistance opens a new website.
Upload
Kaltura lets you upload virtually any media file from your computer to your My Media. Watch the tutorial video or follow the guide below.
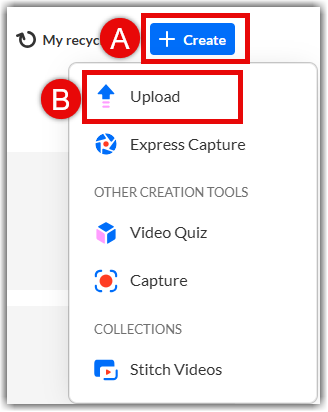
- To add video that is on your computer, access My Media, click + Create (A), and select Upload (B).
- Click + Choose a file to Upload (C).
- Select your media in File Explorer or Finder and click Open (D).

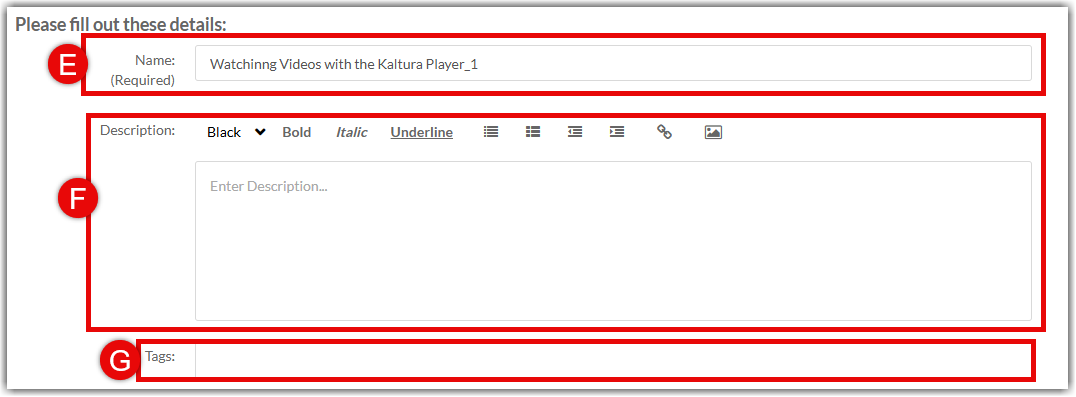
- Add a Name (E), Description (F), and Tags (G).
- Click Save (H). Select Go to Media (I) to view the file or Go to My Media (J) to return to your library.
Add a YouTube Video
The YouTube option incorporates external videos into your course media gallery so that students have the full context of your media resources. This option does not copy a YouTube video into your media repository. Instead, it links out to the YouTube video and plays it in the Kaltura media player. This allows you to play videos without disruptive ads.
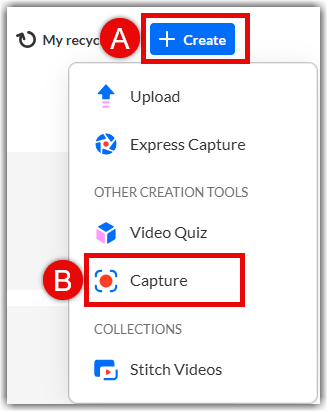
- Access My Media, click Add New (A) and select YouTube (B).
- Enter the YouTube Video Link or URL (C) for the video and click Preview (D).
- The video will load and Play (E) on the right.
Note: If the video continues to load and does not play, click pause and then play again or fast forward. - The Name, Description, and relative Tags (F) should load automatically. You can modify these fields as desired. Set the Publishing Status (G) to your choice.
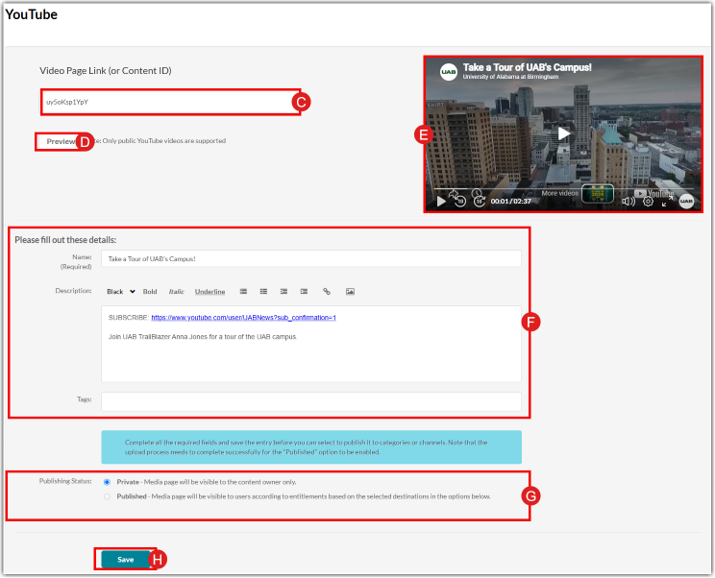
- Click Save (H) when finished.
Express Capture
Express capture allows users to create a video or audio recording quickly without having to download any software. This type of capture cannot capture your computer screen. Webcam recordings can also be done by choosing Kaltura Capture.
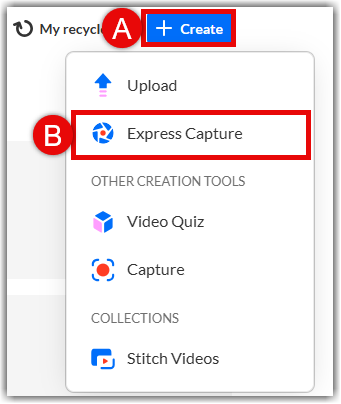
- To record a video from your webcam, access My Media, click + Create (A), and select Express Capture (B).
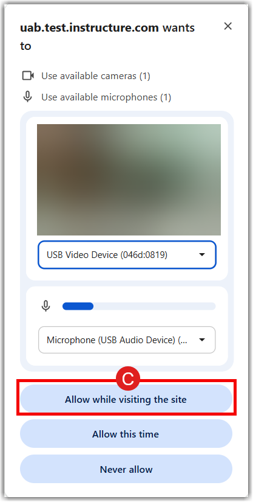
- Select Allow (C) to allow access to camera and microphone.
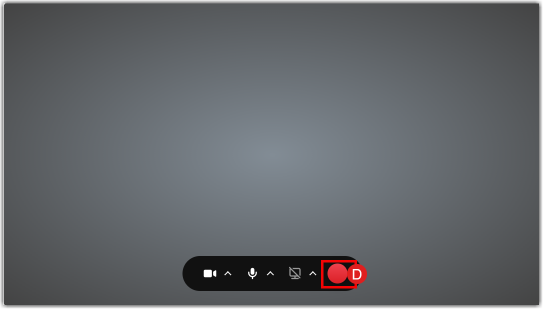
- Click the red Record (D) circle to start/stop recording.
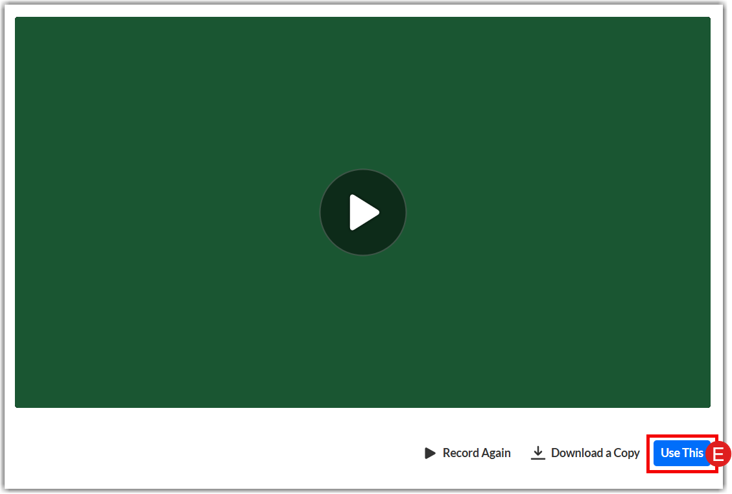
- Select Use This (E) or record again according to your preference.
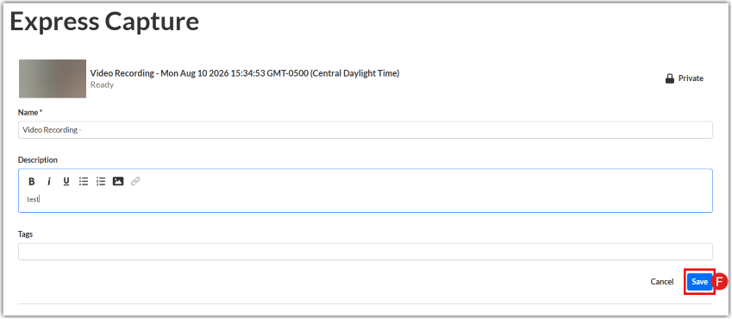
- Add a Name (required), Description, Tags, and Public Or Private Status, then click Save (F).
Kaltura Capture
Kaltura Capture is a desktop recording software that has a simple user interface, requiring only one click to record, without complex setup or a lengthy learning curve. It can record your webcam, screen, microphone, or a combination of those options. Kaltura capture is supported both on Windows and Mac. For more information and details, see the full Kaltura Capture guide.
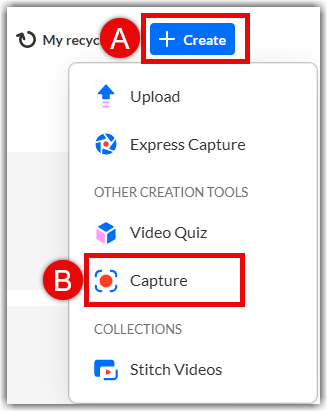
- Access My Media, click Create (A), and select Kaltura Capture (B).
- First-time users: Click the appropriate Download link (C) for your OS. (Skip if already installed).
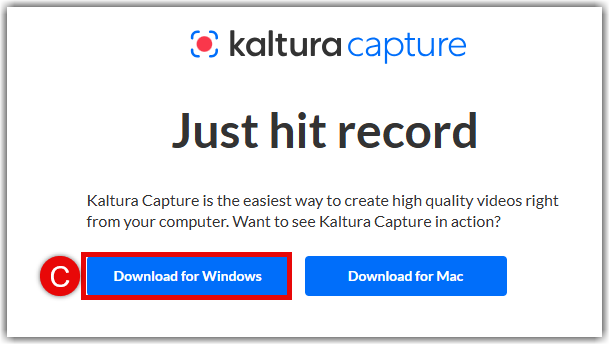
- The application will launch automatically (or open manually via desktop icon).
Recording Media with Kaltura Capture
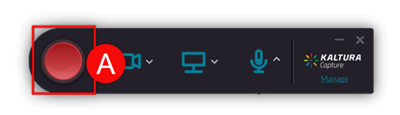
- Once Kaltura Capture is open, click the red Record (A) icon when all settings are as desired and you are ready to record. A 5-second countdown will appear before recording begins.
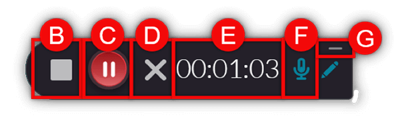
- Click the Stop (B) icon to stop the recording. A follow-up menu will display to confirm this decision.
- Click the Pause/Record (C) icon to pause and resume the recording.
- Click the Cancel (D) icon to stop and discard the current recording.
- The recording menu displays the current Elapsed Time (E) of the recording.
- Microphone (F): Blue signifies audio is enabled; grey with a strikethrough signifies disabled.
- Click Minimize (G) to hide the toolbar from the final recording video.
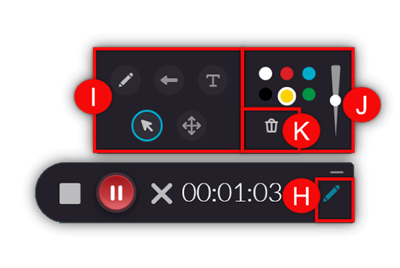
- Click Pencil (H) to open screen Annotation Tools (I) (pencil, arrow, text, selector, cursor). Adjust Color/Size (J) or click Trash (K) to erase.
Saving and Uploading a Recording
Media recorded with Kaltura Capture needs to be uploaded when there is an internet connection. The uploaded media can be found in My Media either in Canvas or at mediaspace.uab.edu.
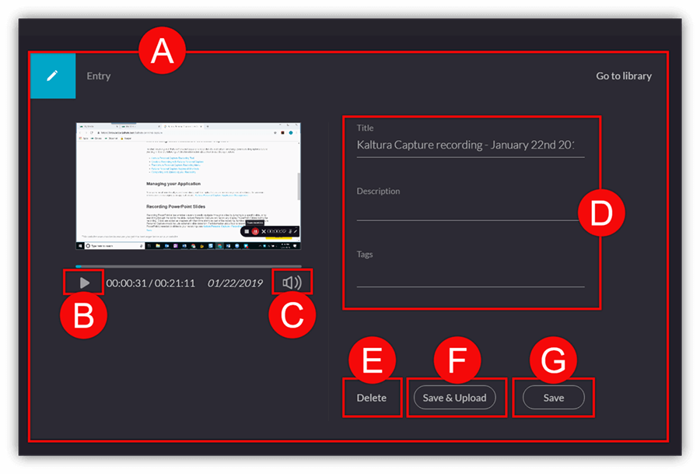
- Once you stop a recording, you will be directed to the Entry page (A).
- Click the Play (B) icon to preview the recording. Note: Two screens will display vertically if you chose to record two video feeds (e.g., Screen & Webcam). This view is just for previewing each feed separately. It will combine the two feeds in the Kaltura Interactive player once uploaded.
- Click the Sound (C) icon to Mute/Unmute audio during playback.
- Enter the desired Title, Description, and Tags (D) for the recording.
- Choose an action:
- Delete (E): Discard recording.
- Save and Upload (F): Upload immediately to My Media.
- Save (G): Keep locally to upload offline later. (Unuploaded media cannot be published).
Link Zoom Recordings to Kaltura
Zoom meetings/webinars recorded to the cloud are automatically uploaded to the user's Kaltura (My Media) account.
Please contact eLearning if Zoom meetings recorded to the cloud do not display in your My Media account.
See the Link Zoom Recordings to Kaltura guide to see how to record meetings to the cloud so that they show up in My Media.